
The French Hair Pin Updo: My Everyday Method
There are many ways to create a hair pin updo using a French hair pin, and that’s part of what makes it so timeless and versatile. Some techniques are more structured, others more relaxed. This is simply one of the ways I personally do it, and the method that works best with my current hair length and texture.
Below, I’m sharing a step by step tutorial for my everyday French hair pin updo. You can also watch the full motion and technique in the linked above, sometimes seeing it in action makes all the difference!
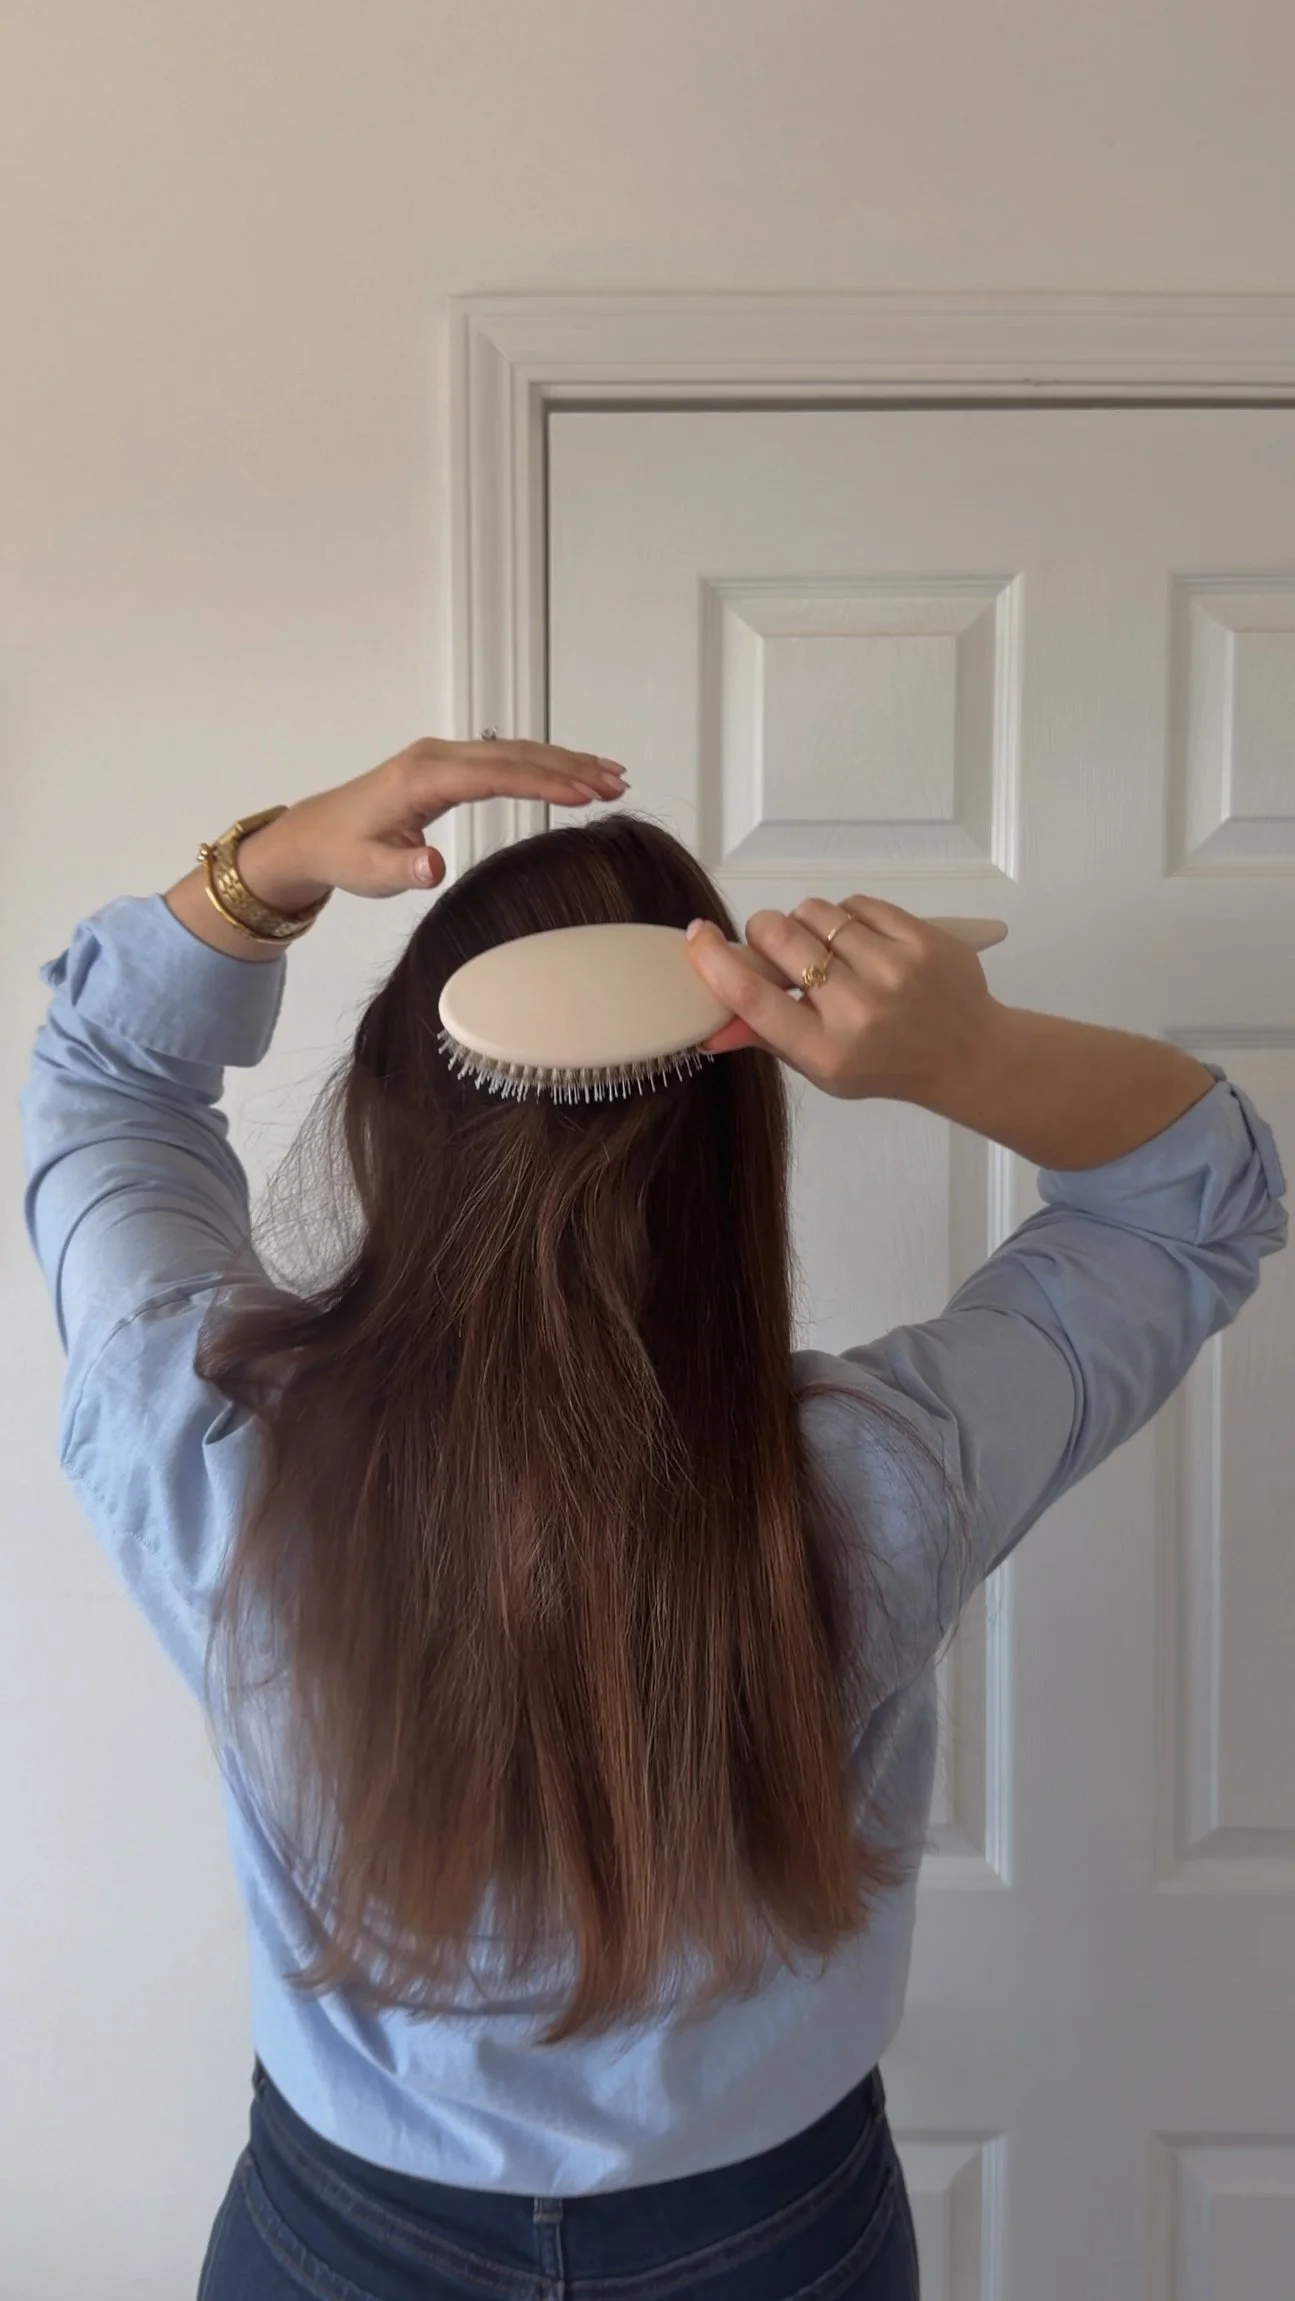
Step One: Prep
I always start by brushing my hair out using my hands or a brush, keeping things simple and gentle.
Recently, I’ve been on a bit of a hair journey and realized I had been using the wrong hair brush for my hair type for years. I have very thin hair that gets oily very quickly, and learning how much the right brush matters completely changed things for me.
Using the right brush has helped add volume at the roots while also redistributing oils through the lengths, which keeps my hair looking healthier, shinier, and less greasy throughout the day. It sounds simple, but the difference has been noticeable.
Before committing to a higher-end brush, which I honestly plan to do after seeing how much of an impact this has made, I’ve been testing things out. I’m currently debating between Mason Pearson and La Bonne Brosse, both seem incredible and very well-loved.
For now, I’ve been using this brush from The Hair Edit (around $20), and it’s been a great starting point while I learn what works best for my hair.
Once my hair is brushed through and prepped, I move on to styling.
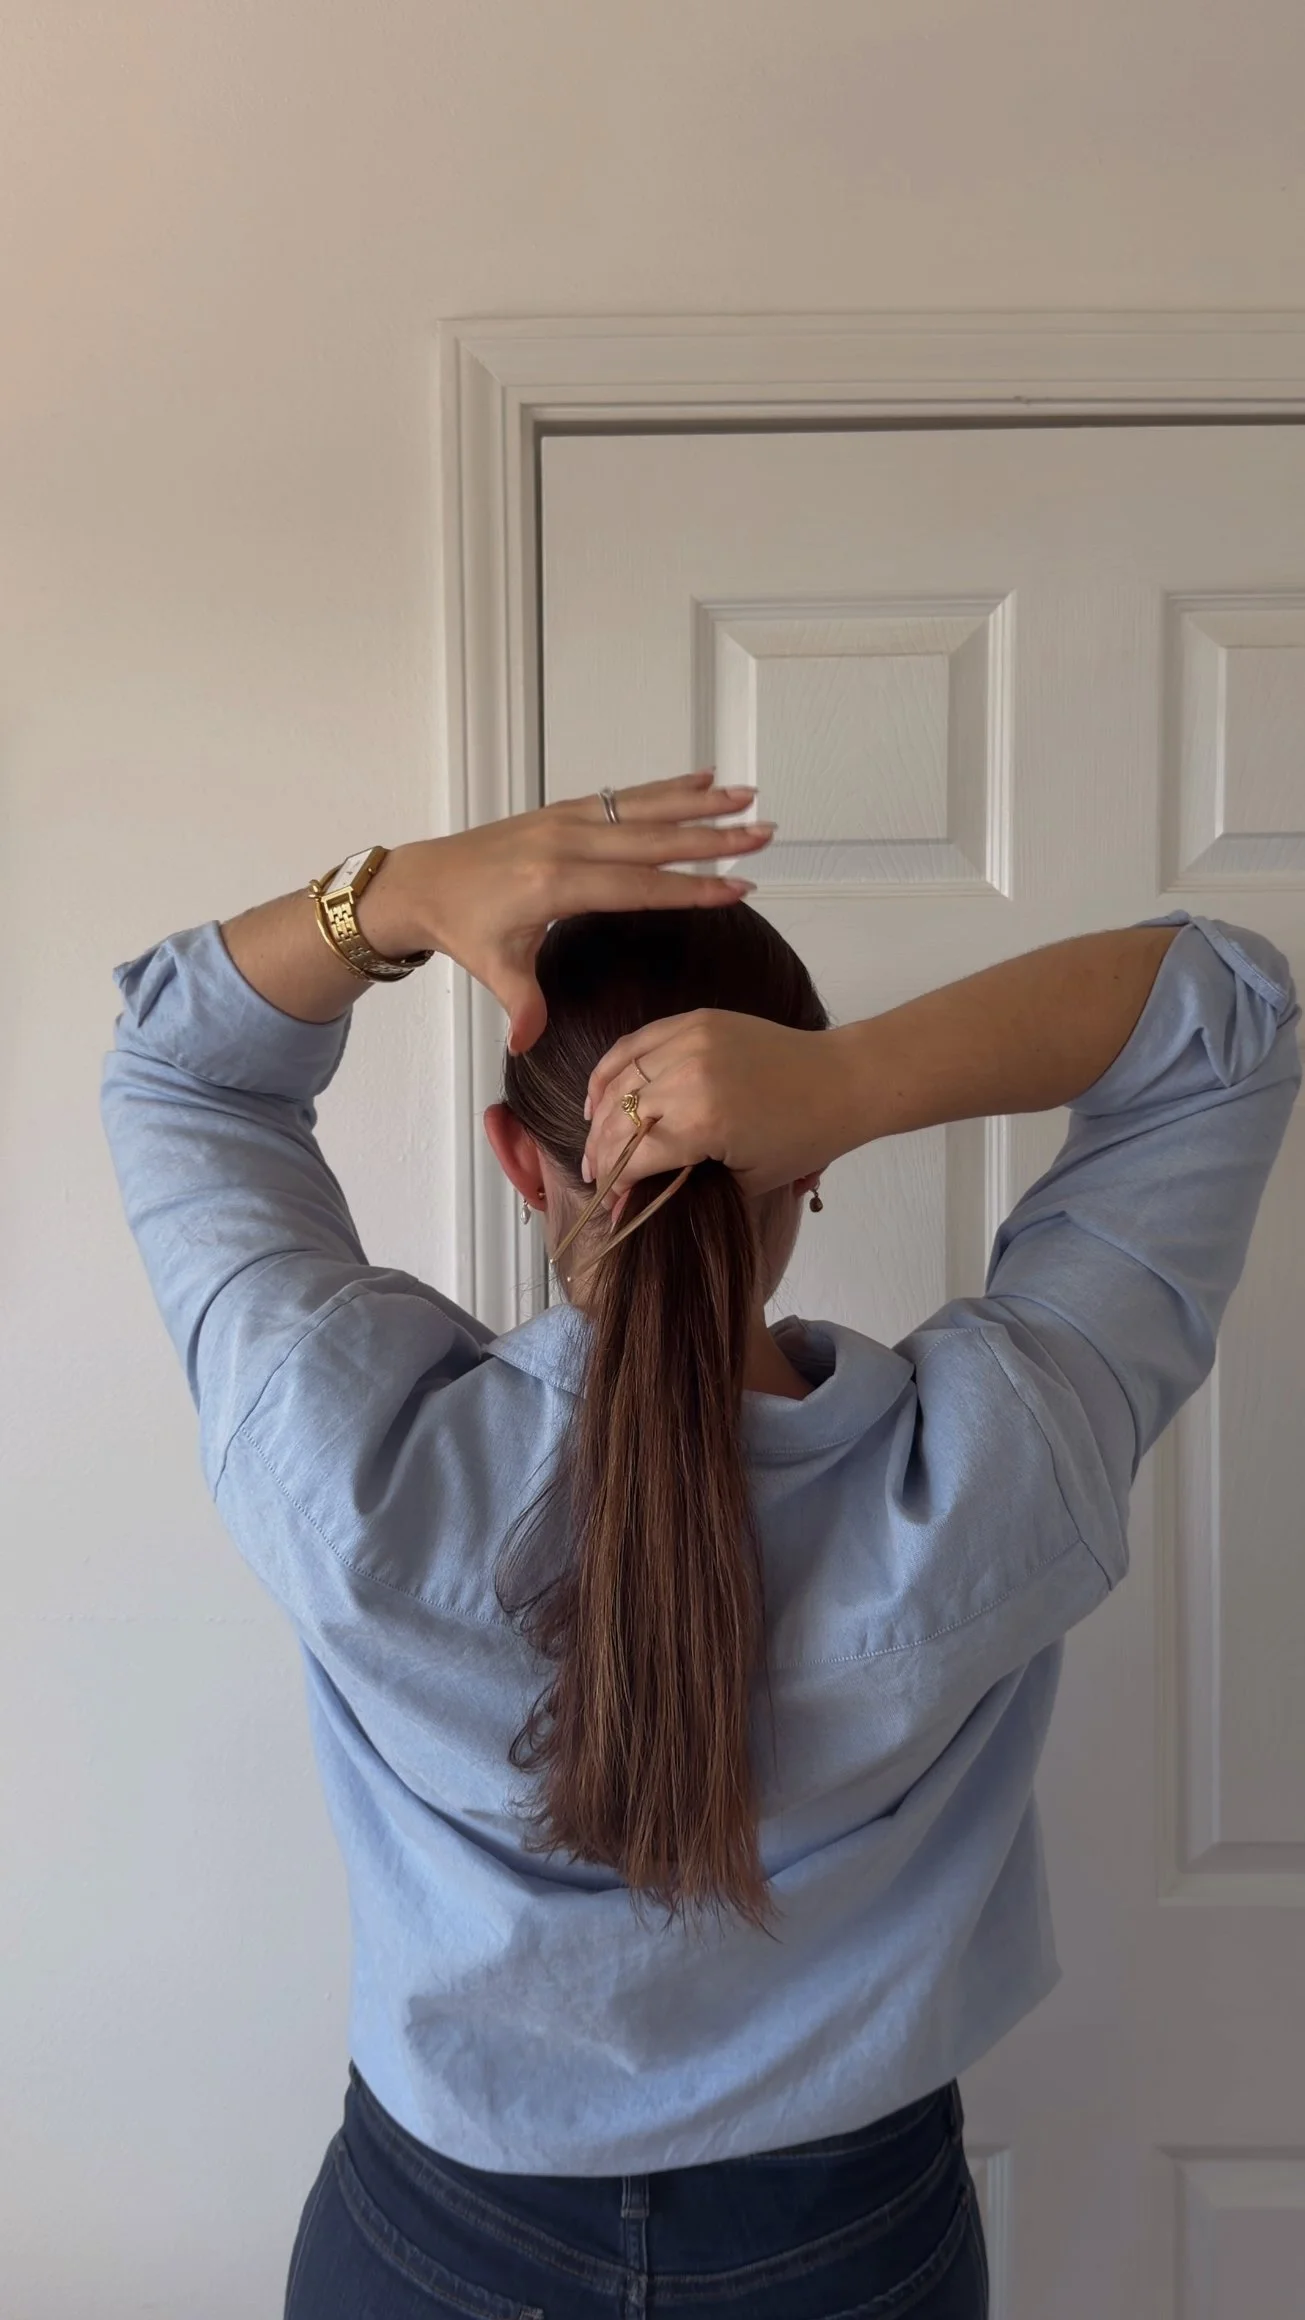
Step Two: Gather
Using my hands, I gather my hair into a low ponytail shape at the nape of my neck. I don’t use an elastic here, I simply hold it loosely, keeping everything relaxed and natural.
Step Three: Twist and Tuck the Ends
I twist the length of the ponytail upward, similar to the beginning of a French twist. I keep the twist fairly tight so it holds well, then soften the look afterward by loosening it slightly for that effortless, undone finish.
Once the hair is twisted, I tuck the ends into the twist itself. Depending on the day and my mood, I’ll either fully tuck them in or let a few shorter pieces peek out. I keep everything secure at this stage, then soften the look afterward by gently loosening the twist for a relaxed finish.
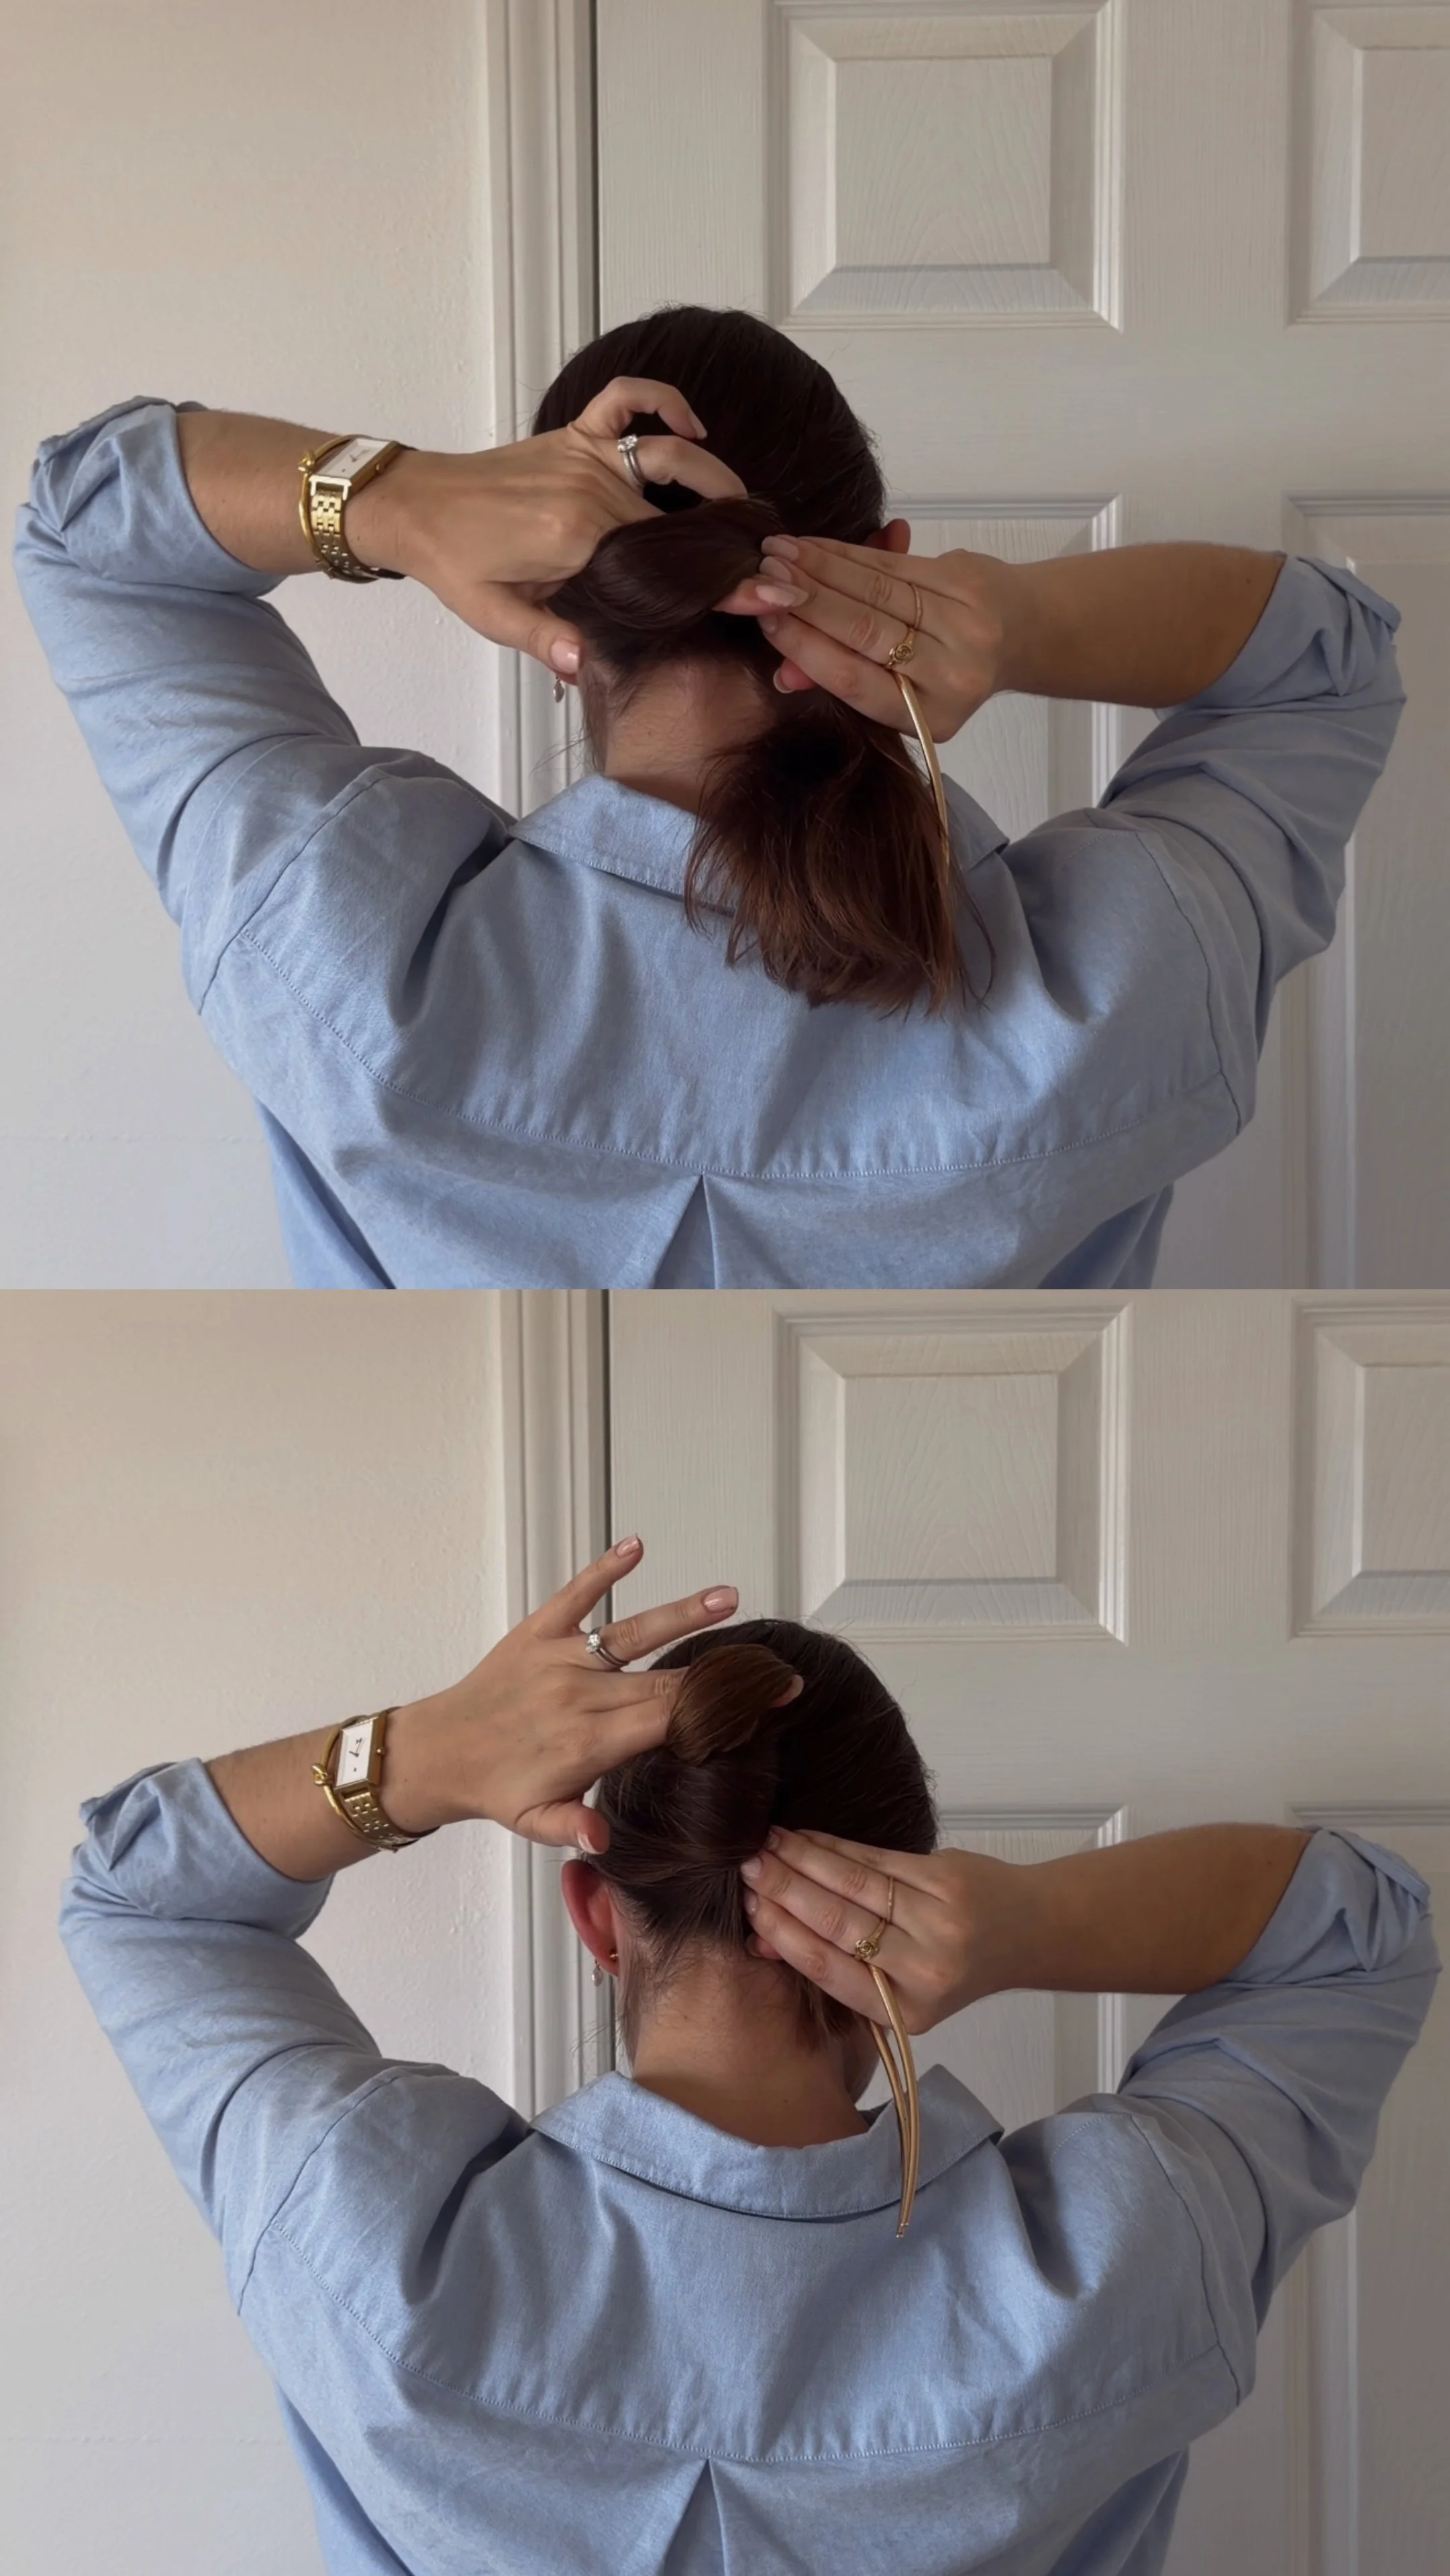
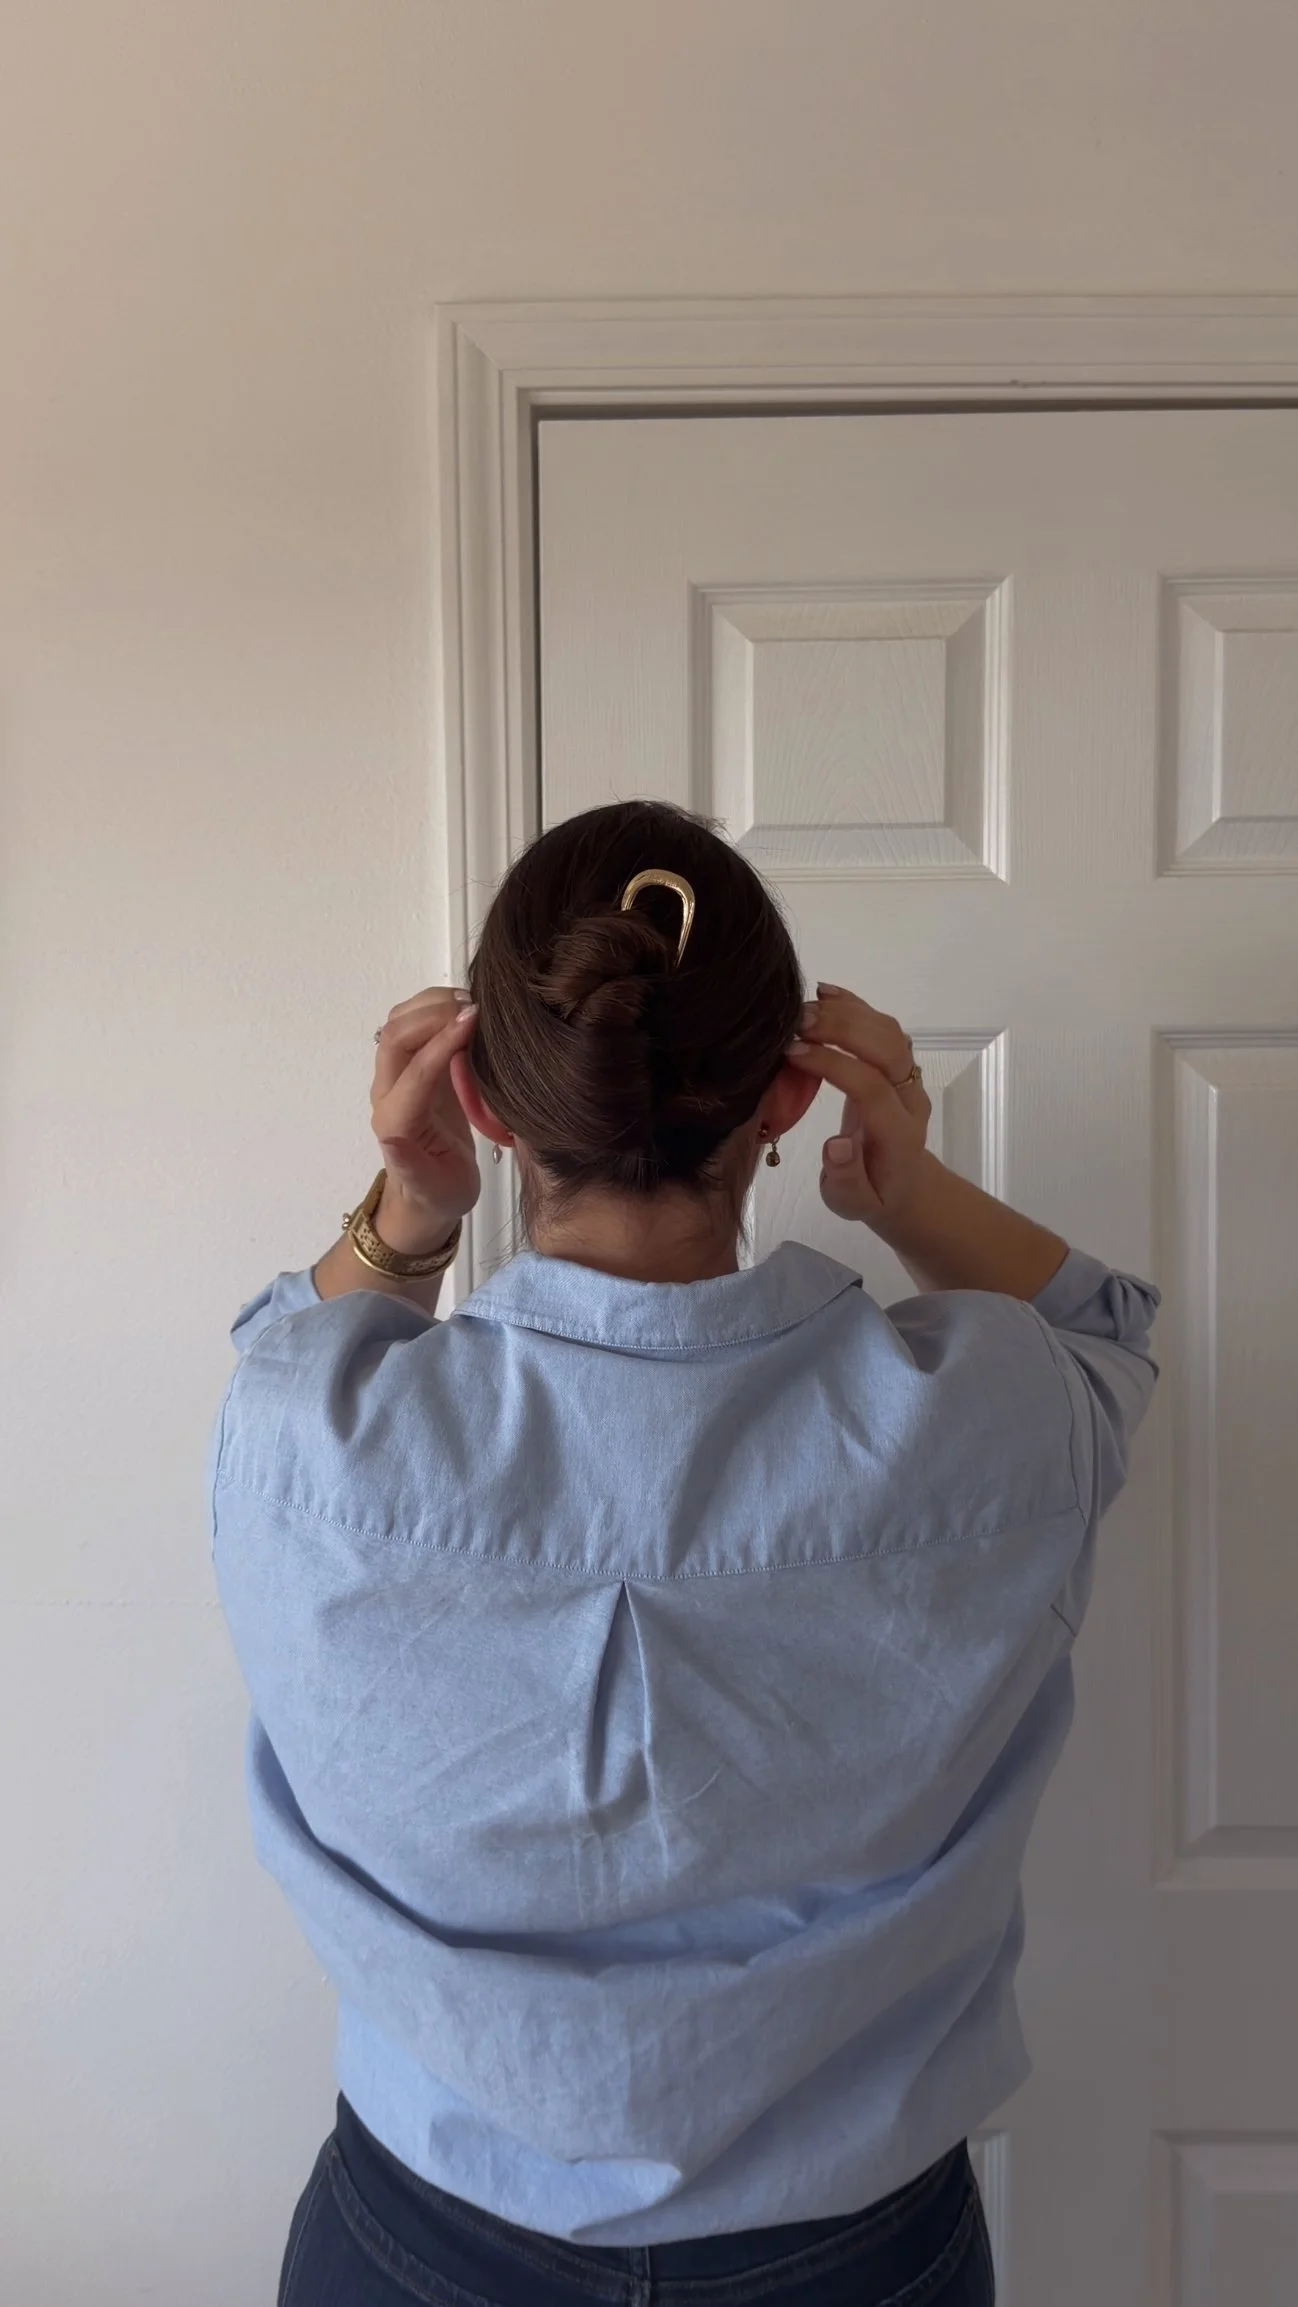
Step Four: Pin and Secure
This is where personal technique really comes into play.
I start by placing the tip of the pin at a slight angle, making sure it catches a bit of the twisted hair at the base. From there, I gently raise the pin upward, then slide it straight down, close to the scalp. You should feel the hair being held in place, secure and supported, without feeling overly tight.
This subtle weaving motion helps anchor the style and keeps it in place, especially for finer hair.
There are many ways to secure a French hair pin. Some people prefer to insert it vertically and then flip it horizontally to lock it in place, while others, like me, prefer the straight-down weave for a softer, more effortless hold. Both techniques work, it really comes down to your hair type, length, and whether you prefer a more polished or relaxed finish.
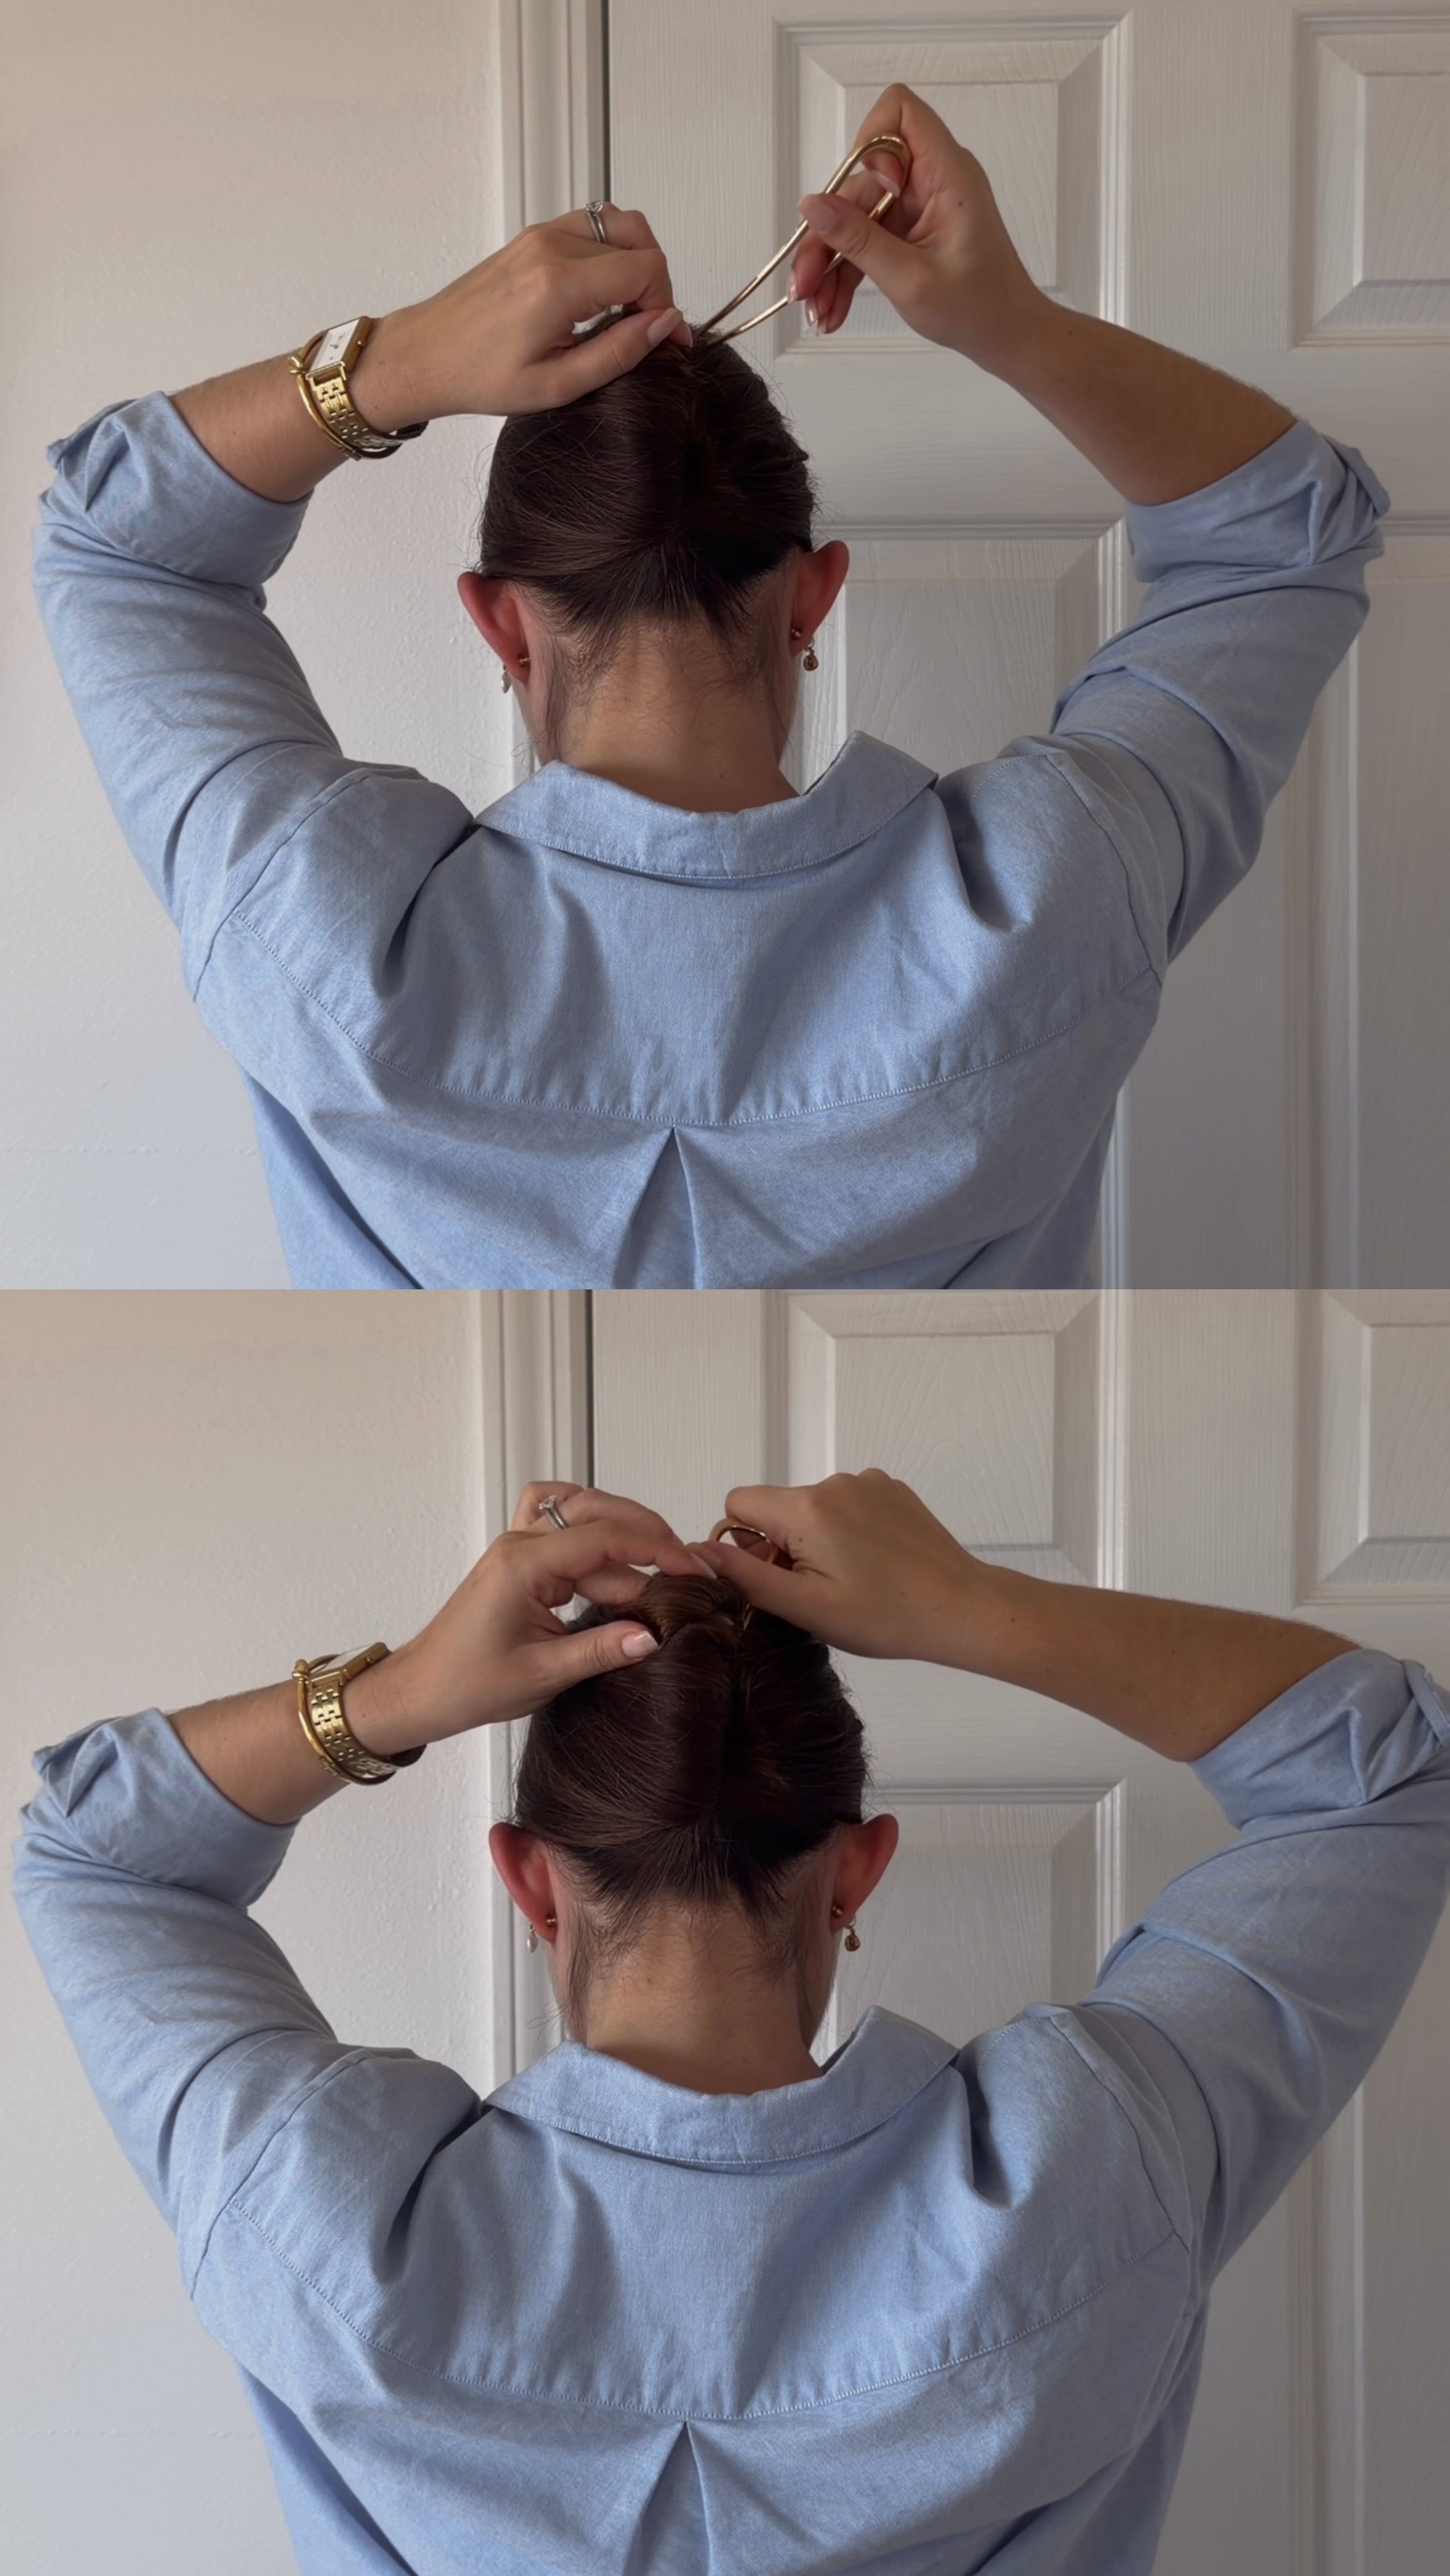
Final Touches
Once the pin feels secure, I gently loosen the twist at the crown for a bit of volume and pull out a few face-framing pieces if needed. The goal is for it to look polished, but never too perfect.
This is the kind of updo I wear for everyday errands, coffee runs, or casual dinners, simple, timeless, and easy to recreate once you get the hang of it.
If you prefer seeing the motion, you can watch the full step by step in the Instagram Reel and save it for later when you need a quick, chic hairstyle that takes under a minute!
Fast Troubleshooting (So It Doesn’t Fall)
If your French hair pin updo doesn’t feel secure right away, a few small adjustments usually make all the difference. Here are the most common issues and how to fix them.
Slips out quickly: You likely need more “scalp grab.” Insert the pin closer to the scalp and make sure it catches a small section of hair at the base of the twist as you slide it in. That anchor point is key.
Hair feels too silky: If your hair is freshly washed or very smooth, add a bit of texture spray or dry shampoo before twisting. You can also create a quick half-pony with a small elastic first, then twist that section, it gives the pin something to hold onto.
Very thick hair: Try twisting the hair a bit tighter and inserting the pin deeper into the twist. For extra hold, you can also use two pins, crossed in an X shape.
Fine hair: A slightly messier twist actually works better. Leaving a bit of looseness creates more bulk, which helps the pin grip and stay in place longer.
Not in the mood for a pin: If you don’t feel like using a French hair pin, a claw clip works beautifully using the exact same twisting method. I do this often for everyday wear. Just twist the hair up and secure it with a medium or larger claw clip for a relaxed, effortless look that still feels chic.
Shop the Hair Pins
If you’re looking to recreate this updo, the key piece is, of course, the French hair pin!
Below is the exact hair pin I used for this tutorial, the one that works best for my current hair length and texture. I’ve also linked several other hair accessory options I’m loving, from simple, classic shapes to slightly more elevated finishes, so you can find the one that feels right for you.
French hair pins can vary in weight, size, and shape, and those details really do make a difference depending on your hair type. If your hair is fine, a lighter pin with a bit of texture tends to hold best. For thicker hair, a slightly heavier or longer pin can offer more support.
Explore the links below and choose the style that fits your everyday routine and hair needs.
Final Thoughts
Like most things in French style, this updo isn’t about perfection, it’s about ease and finding what works for you. The French hair pin is one of those simple tools that looks intimidating at first, but once you find a method that suits your hair length and texture, it quickly becomes second nature.
This is just one way to wear it, and I encourage you to experiment. Try different twists, pin placements, and finishes until it feels natural. The beauty of this style is that it adapts to you, not the other way around.
Whether you’re getting ready for a busy morning, a casual lunch, or an evening out, this is a hairstyle that always feels polished without feeling overdone. A quiet classic that fits seamlessly into everyday life.
Save the tutorial, revisit it when you need a quick, chic option, and don’t forget to watch the Instagram Reel if you want to see the full motion in action!
Looking for more inspo? You might also be interested in:
With Amour,
M.